


Part Nine
The first “crossroad” is the decision to do a complete assembly before painting or not. If you have the space to work in, it is good to do it to finish the flap controls, fuel vents and also to do the work on the root fairing. If you do not have the space, it can be done after painting.

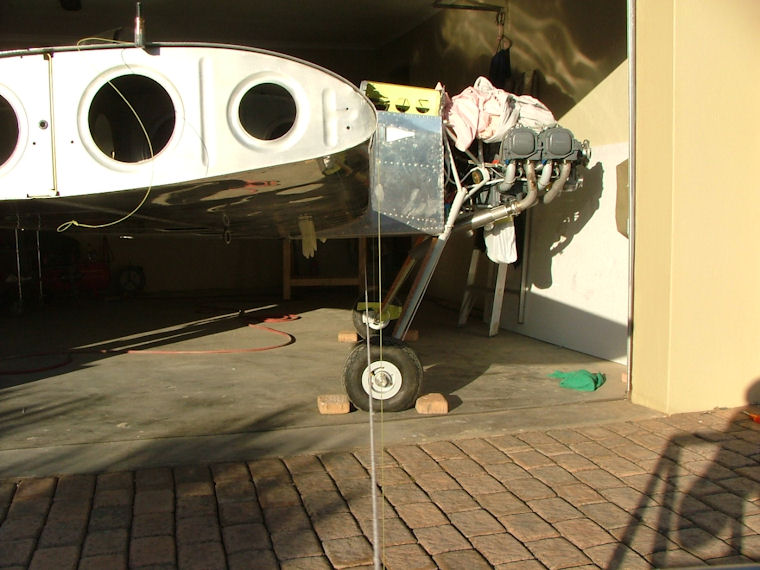
You can even do one wing at a time as seen here
Fitting the wings is where it gets interesting and some people find it a big hurdle until they have done it. I will discuss the two seaters here as it is much easier with the RV10. Prepare well and have the following ready:
Two good strong trestles to put the wings on. Proper drift pins or cheap bolts that you can use to insert in the place of the expensive close tolerance bolts. One or two friends outside and you inside. Remember to bevel the bottom ends of the spars in order to make it easier to slide it in. Move the wing spar into the spar box slowly by pushing in and at the same time moving the tip up and down and sideways. Remember also to lift it at the root otherwise the skins will snag.
Once lined up, insert at least one upper bolt and one lower 7/16 bolt. Do not drive them in all the way, specially on the nose wheel models. Getting them out might be a challenge. You will notice that there is a lot of forward and backward movement of the wing.
Next would be to adjust the incidence and alignment of both wings. The plans clearly describes the process, but here are some pointers:
With both wings in and temporary bolts fitted, level the fuselage in both directions and hang four plumb bobs from the leading edges. Two left and two right. Good positions are at the wing tips and close to the inboard ends.
Alignment of the wings
Then square the wings with the fuselage. This is done by measuring from the wing tips to a point on the tail cone. Then check if your plumb bobs are inline and adjust the wings if not. Then you also have to adjust the rear spar up or down, using a block and a spirit level.
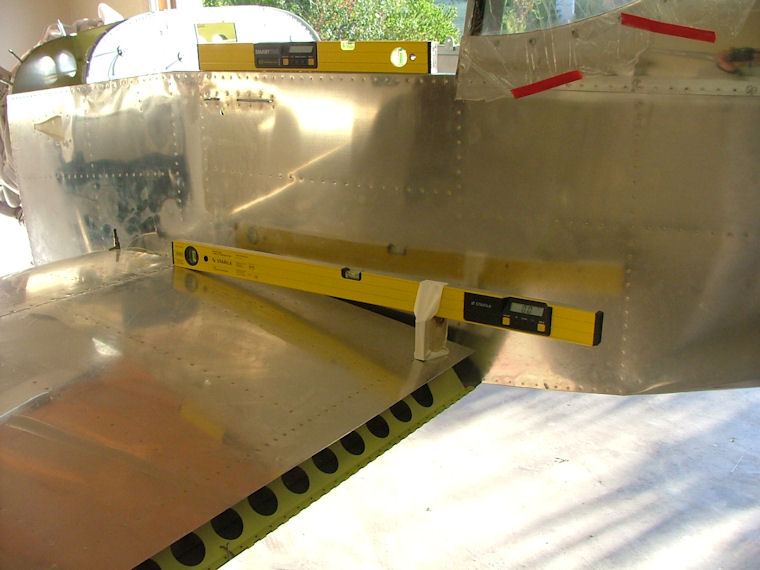
Adjusting the rear spar
The instructions are very clear on this and if you follow it, you will have drilled the much feared hole in the rear spar in no time.
Very important also is the two rows of screws joining the fuselage belly and the inboard bottom wing skin. These are structural and must not be left out. I have found it not installed recently on an RV imported from the USA. Luckily this owner did not do aerobatics with his RV - not yet!
Then on to painting. The big question obviously is if you are willing to tackle this huge task on your own, or hand over your baby to the professionals. Let us assume that you have decided to tackle it on your own.
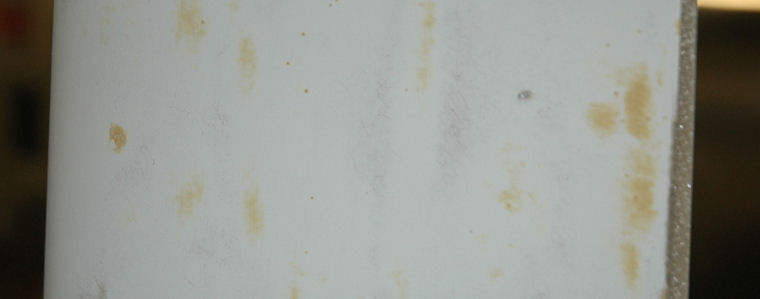
On all the fiber glass parts, the most important part is to get rid of the thousands of pin holes and weave holes. Some people will try and pile on primer to do it and what you will achieve by doing this is to bridge the pin holes. This means that you will have trapped tiny air bubbles, which in turn will heat up (especially on the top cowl) and burst when you have flown.
Untreated pinholes and weave holes
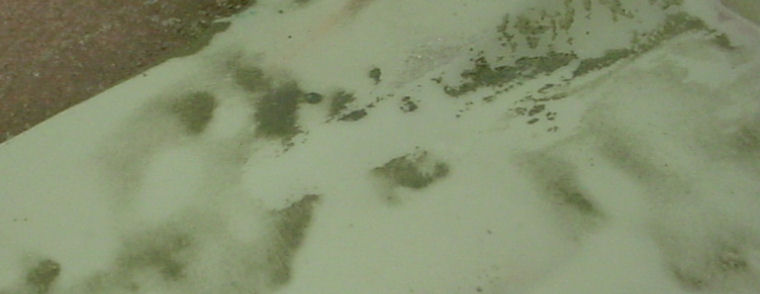
Pin holes remaining after applying the first gloss coat
Undulations showing up when lightly coated with paint and sanded.
The alclad surfaces are easy. I usually scuff everything with Scotchbrite pads and degrease it properly before applying a good primer. There are many products on the market but I like to use Plascon APU107 (1K) mixed 2.1 with thinners.
Once you have done all this it is time to tackle the gloss coats or take it to the professionals.
Next month I will discuss final inspection and the maiden flight. Keep on pounding!
 |
 |
 Copyright © 2024 Pilot's Post PTY Ltd
The information, views and opinions by the authors contributing to Pilot’s Post are not necessarily those of the editor or other writers at Pilot’s Post.
Copyright © 2024 Pilot's Post PTY Ltd
The information, views and opinions by the authors contributing to Pilot’s Post are not necessarily those of the editor or other writers at Pilot’s Post.