


We still need wings and so on for our RV. One good thing about building an RV is that there is really a huge unofficial support system out there on the internet, as well as local builders who has walked down this road before.
What I like about the RV wings is that you do not need a very complicated jig to build your wings. But please make sure that your wing jigs or stands are sturdy and bolted down securely. There are builders who prefer the wing stands on wheels - this is also nice but make sure they will not get top heavy. You will find a basic setup on drawing 12A of your plans.
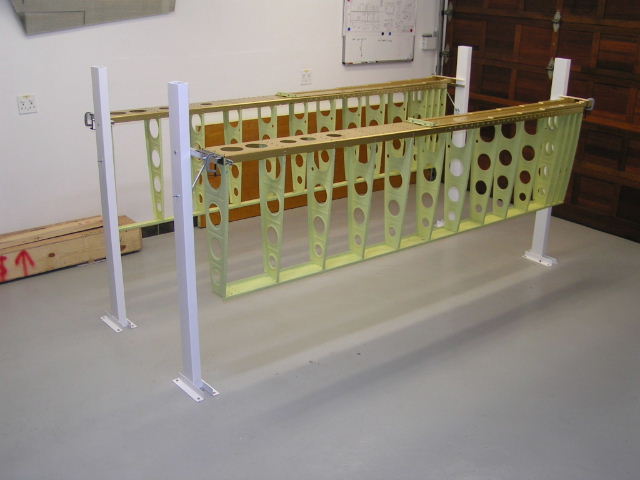
Picture of typical wing stands by Rudi Greyling
After you have clecoed together the main spars, rear spars and ribs you will realize that it is now looking more and more like wings. Note that the center of the “skeleton” will sag and you need a support in the center and you will also have to align it properly.
Your next task should be to cleco on the main wing skins and do the usual match drilling deburring and finally dimpling. Do not forget the wing walk doubler plate!
Next you will move on to the leading edge sections of the wings. Here again you will have to build a simple cradle to assist you during assembly of the leading edge sections as well as the fuel tanks.
Before you cleco the leading edge ribs and also later on the tank ribs - do yourselves a big favor and round off the forward ends of the rib flanges slightly. Very often when you look at a finished RV you can see small bulges on the leading edge skins where the rib flange ends are pressing against the inside of the skin. Interestingly one can often tell if it is a “slow” built when you see those bulges.
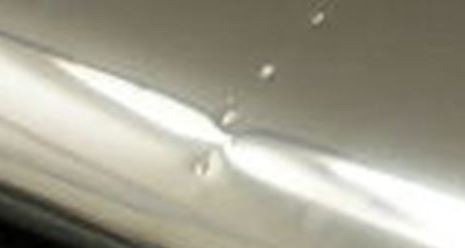
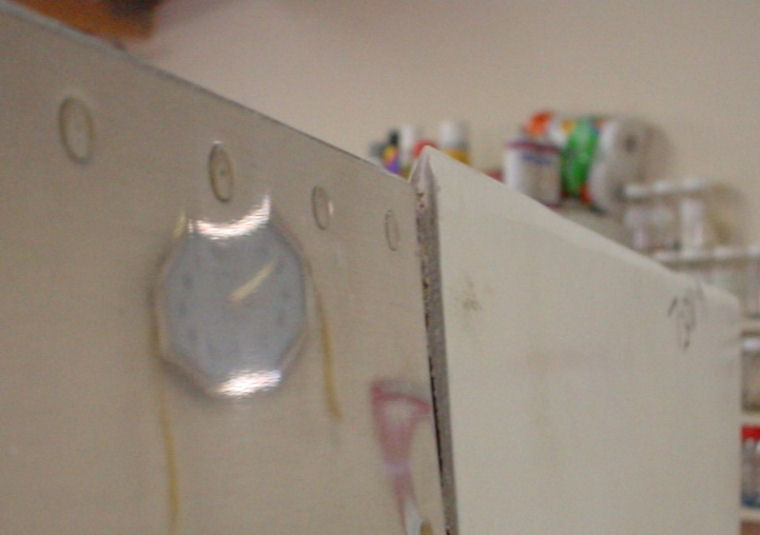
Note the small bulge on the LE
Once again it pays off to read through the section carefully and also study the drawings carefully in order to make sure that you do things in the right sequence. It is very hard to disassemble parts that have cured with tank sealant in between.
As the normal dimple dies that you will get with your tool kit is designed to accommodate a rivet head in the dimple, I will strongly recommend that you buy a tank dimple die set. The difference here is that a tank dimple die set will dimple slightly deeper in order to leave a gap that your tank sealant will fill. Should you use the standard die set, you might have tank rivets sitting slightly proud.
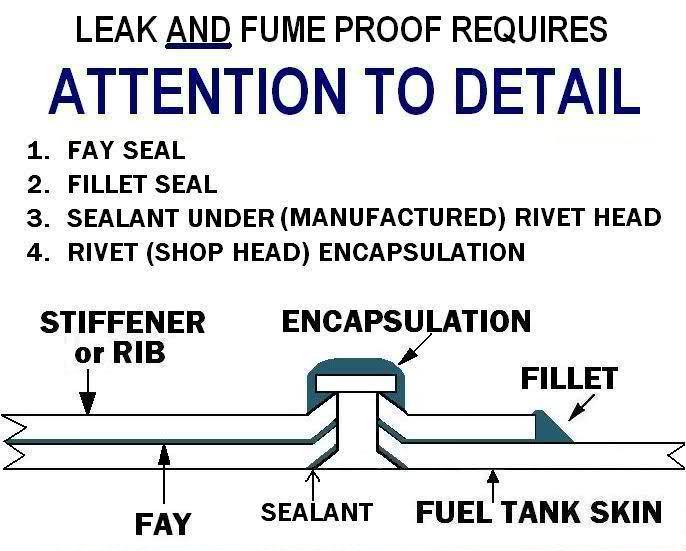
Building the tanks is the one time where you should not try to save weight by applying too little tank sealant. I found the picture below on the internet and it really explains a lot. Have a careful look at it and you will understand where you have to apply tank sealant in order to build a good tank.
Plan carefully and have everything ready before you start mixing your Proseal. Use gloves and work in a well ventilated area. Another plus will be to have someone helping or on standby who keeps his/her hands clean. Try and tackle the tanks in stages with the rear baffle last. Remember to verify your float type sensor's position (if it is a two seater RV) and operation before you finally close the rear baffle.
Finally you have to leak test your tanks. There are various methods, but personally I like both the “glove” or “balloon” method as well as the “manometer” method. In both cases the tanks needs to be pressurized and it is ideal to run the test over a few days. Be careful not to over pressurize your tanks and make sure that they are not leaking. There is one slight advantage of the manometer test and that is that you can mark the level of the water on the pipe when the temperatures are at minimum and maximum. If you have no leaks the level should be the same at the same temperatures. The one thing that you do not want to do is to take off the tanks and open them up again to try and fix leaks.

Two shining new tanks - note the balloon for the leak test
Then it is time to move on to building your flaps and ailerons. By now this will be a walk in the park for you and I will not dwell on that. Let us rather look at the wing tips. Due to small variations in each build, or the molds maybe, it is very important to have your flaps and ailerons installed and properly in trail (not exactly on the RV10 where you have to set the flaps to the reflex position) before you start aligning and fitting the wing tips. Once again you have two options - rivet them on or use about 60 platenuts, washers and screws per wingtip.
Once you have aligned, drilled and clecoed on the wingtips, you may find a small misalignment in the vertical. The fix is really easy if you split the trailing edge using the small thin disk that you also use to cut plexi with. You can now align it and re-bond it. The trialing edges might be longer or shorter than the ailerons. This can be fixed by filing off or building them up slightly using resin and flox.
You will find that the wingtips seem to be extremely “floppy” before they are installed, but really stiffens up quite well after they are installed. Personally I like to add a few small foam strips with one layer of glass to the inside of the top surface to stiffen it even further and in an attempt to prevent damage or paint cracks should someone press down on them hard.
This picture clearly shows a wing tip not aligning as well as too long
When to attach the wings - if you have enough space you can attach the wings in order set up the sweep and incidence, to drill the rear spar holes, trim the root fairings and most important of all, to fit the platenuts that the plans show fixing the bottom wing skins to the bottom fuselage skin. When I asked Vans about this recently, their advice was not to even attempt to fly the AC without those screws as they are structural. The scary part is that I have recently seen an RV without them as well as another with only a few installed, because they had the sweep wrong and could not install the rest!
Next month I will discuss painting and final assembly of the complete airframe. Keep on pounding!
 |
 |
 Copyright © 2024 Pilot's Post PTY Ltd
The information, views and opinions by the authors contributing to Pilot’s Post are not necessarily those of the editor or other writers at Pilot’s Post.
Copyright © 2024 Pilot's Post PTY Ltd
The information, views and opinions by the authors contributing to Pilot’s Post are not necessarily those of the editor or other writers at Pilot’s Post.